
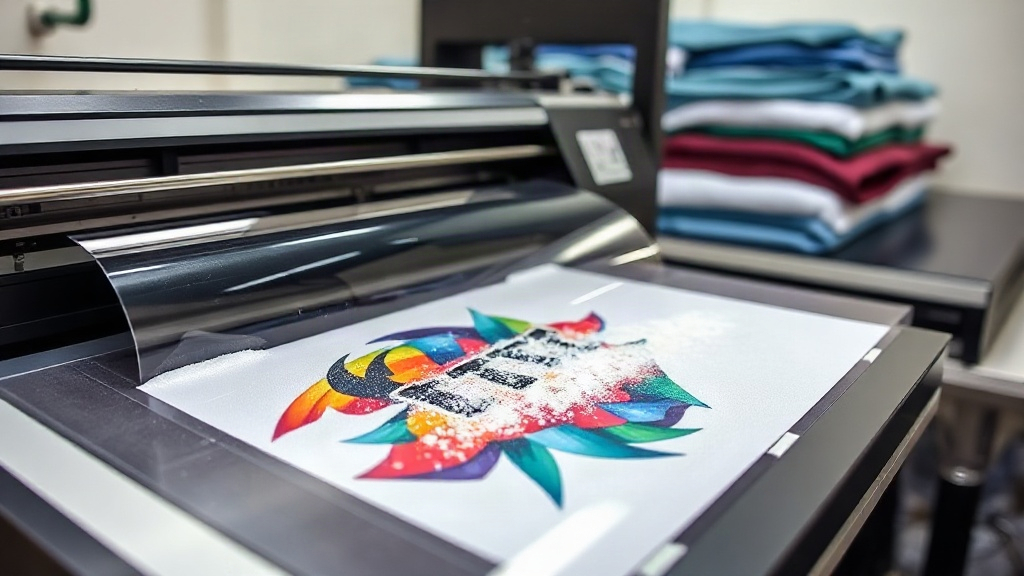
When you first encounter DTF printing, it might seem like just another heat transfer method. But dig a little deeper, and you'll find a process that solves many of the limitations of vinyl and screen printing. Whether you're a small business owner looking to expand your product line or a hobbyist wanting to print detailed designs on demand, understanding DTF printing can open up new creative and commercial possibilities. This guide will walk you through the entire DTF workflow, from file preparation to the final press, with practical tips I've gathered from countless hours of printing and troubleshooting.
What Exactly Is DTF Printing?
DTF stands for Direct to Film. It's a printing method where your design is printed onto a special PET film using a DTF printer, which typically uses pigment-based inks. After printing, a thermoplastic powder (often called hot melt adhesive) is applied to the wet ink. The powder sticks to the ink, and then the film is cured. Once cured, the transfer is ready to be applied to a garment using a heat press. The magic happens when heat and pressure melt the powder, bonding the ink to the fabric. Unlike DTG (Direct to Garment), DTF doesn't require pre-treatment of the fabric, and it works on a much wider range of materials, including cotton, polyester, blends, and even some treated nylons.
Why Choose DTF Over Other Printing Methods?
If you've worked with heat transfer vinyl (HTV) or screen printing, you know their pain points. HTV is great for simple, single-color designs, but layering multiple colors is time-consuming and often results in a thick, stiff feel. Screen printing offers excellent durability and color vibrancy for bulk orders, but the setup costs and minimum quantities make it impractical for small runs or one-offs. DTF bridges the gap: it allows for full-color, highly detailed prints with no minimum order, and the transfers are thin and stretchable. Plus, because the design is printed on a film, you can prepare transfers in advance and press them on demand. That flexibility is a game-changer for print-on-demand businesses and crafters who attend markets.
The DTF Printing Process Step by Step
Getting a perfect DTF transfer requires attention to detail at each stage. Here's a breakdown of the workflow, along with the settings and tricks that have worked for me.
1. Design Preparation
Start with a high-resolution image, ideally 300 DPI at the final print size. Vector files are great, but raster images work too if they're crisp. Remember that DTF prints are opaque, so you don't need to worry about background colors, but you do need to mirror your design horizontally before printing. Most RIP software does this automatically, but always double-check. Also, consider the fabric color: white ink is used as a base, so lighter colors will pop more on dark garments. If your design has fine details, avoid thin lines below 0.5 pt, as they might not hold up well after pressing.
2. Printing the Transfer
Load your DTF film into the printer, ensuring the coated side faces the printhead. The printer lays down a layer of white ink first, followed by CMYK inks. This order is crucial for opacity. You'll want to set your printer to the correct ink limits and resolution; too much ink can cause smudging, while too little results in dull colors. I typically use a resolution of 1440 dpi for detailed artwork. After printing, the film will have a wet, slightly raised feel. Handle it carefully to avoid touching the ink.
3. Applying the Powder
While the ink is still wet, sprinkle the DTF powder evenly over the printed area. You can do this manually or use a shaker. Gently tilt the film to let excess powder fall off, then tap the back to remove any clumps. The goal is a thin, uniform layer of powder adhering only to the ink. Any powder on the clear film will melt and create a messy background, so be thorough. Some printers have an integrated powder application unit, but manual application works fine with practice.
4. Curing the Transfer
Curing melts the powder and sets the ink. You can use a heat press or a dedicated curing oven. If using a heat press, set it to 160-170°C (320-340°F) with low pressure. Place the film powder-side up on a sheet of parchment paper or silicone paper, and press for 2-3 minutes. The powder should turn from white to a glossy, clear finish. Avoid over-curing, as it can make the transfer brittle. Once cured, the transfer can be stored in a cool, dry place for weeks.
5. Pressing onto the Garment
Now the fun part: applying the transfer to your fabric. Preheat your heat press to 150-160°C (300-320°F). Place the garment on the press, smooth out any wrinkles, and position the transfer ink-side down. Cover with parchment paper and press for 10-15 seconds with medium pressure. For best results, use a press that applies even pressure across the platen. After pressing, let the garment cool completely before peeling off the film. If you peel while hot, the design might stretch or peel prematurely. Once cooled, peel the film in a smooth, steady motion. The result should be a vibrant, flexible print that's integrated into the fabric.
Common DTF Problems and How to Fix Them
Even with experience, issues can arise. Here are a few common ones and their solutions:
- Colors look dull after pressing: This often means under-curing of the powder or insufficient pressure. Increase curing time or pressure slightly.
- Transfer peels off after washing: Likely under-pressed. Ensure you're using enough pressure and the correct temperature. Also, check that the fabric is clean and dry before pressing.
- Powder not sticking: The ink might be too dry. Work quickly after printing, or increase humidity in your workspace.
- Film wrinkles during pressing: Use a pressing pillow or place the garment over a sleeve board to avoid seams. Also, ensure the transfer is flat before pressing.
DTF on Different Fabrics: What Works Best?
One of DTF's biggest advantages is its versatility. It adheres well to cotton, polyester, cotton-poly blends, and even spandex. However, results can vary. On 100% cotton, the print feels soft and stretches with the fabric. On polyester, especially high-performance fabrics, you might need to lower the pressing temperature to avoid dye migration. For nylon, a special adhesive powder may be required. Always test on a scrap piece first. Also, DTF doesn't work well on fabrics with heavy coatings or waterproof finishes, as the adhesive can't bond properly.
DTF vs. DTG: A Quick Comparison
DTG printing has its place, especially for 100% cotton shirts with a soft, vintage look. But DTF outperforms DTG in several areas: no pre-treatment, works on dark and light fabrics equally well, and produces more durable prints on synthetic blends. DTG can be faster for one-off prints on cotton, but DTF offers more consistent results across fabric types. If you're printing on a variety of garments, DTF is likely the more versatile choice.
Frequently Asked Questions About DTF Printing
How long do DTF transfers last?
When applied correctly, DTF transfers can last as long as the garment itself. Proper washing (inside out, cold water, no bleach) and avoiding high heat in the dryer will extend the life. I've seen prints last over 50 washes with minimal fading.
Can I use DTF on dark shirts?
Absolutely. In fact, DTF excels on dark fabrics because the white ink base provides excellent opacity. The colors remain vibrant without needing a white underbase like in screen printing.
Do I need a special printer for DTF?
Yes, you need a DTF printer that uses pigment inks and has a white ink channel. You can convert some inkjet printers, but dedicated DTF printers are more reliable. Alternatively, you can outsource printing to a service and just do the pressing yourself.
What's the difference between DTF and DTG?
DTF involves printing on a film and transferring, while DTG prints directly onto the garment. DTF works on more fabrics and doesn't require pre-treatment, but DTG can be softer on 100% cotton. DTF also allows you to stock transfers for on-demand pressing.
How do I store DTF transfers?
Keep them in a cool, dry place, away from direct sunlight. They can be stacked with parchment paper between them. Properly cured transfers can last for months.
Mastering DTF printing takes practice, but the results are worth it. With its versatility and durability, DTF opens up a world of possibilities for custom apparel. Whether you're just starting or looking to refine your technique, the tips above should help you achieve professional-quality transfers. Happy printing!