DTF transfers for beginners open a practical path from digital design to wearables, making the craft approachable for new makers. As you explore direct-to-film transfers, you’ll learn DTF printing basics, and you’ll see how DTF film quality can affect color, durability, and adhesion. A beginner-friendly workflow keeps the process forgiving while offering room to experiment with color, texture, and layering, along with DTF design tips to guide your choices. From substrate choices to using a heat press for DTF, you’ll build confidence with a simple, repeatable sequence you can apply to different projects. With practical tips and common considerations, you’ll move toward consistent, professional-looking results and a solid foundation for future projects.
An accessible, film-based transfer method offers beginners a gentle entry into wearable printing, often described as a film-on-fabric technique. In this approach, artwork is printed onto a specialized sheet, coated with adhesive powder, and then fused to cotton or blends using a controlled heat press. Think of it as a print-on-film process that relies on precise alignment, reliable underbase (when needed), and careful curing to prevent cracking or peeling. Focus on choosing quality transfer film, maintaining your equipment, and logging temperatures and times to stay consistent across projects. As you practice, you’ll discover that the core ideas, design prep, printing, powdering, curing, and finishing, apply across fabrics and styles, with results that resemble professional apparel.
DTF Transfers for Beginners: From Design to Ready-to-Wear Shirts
DTF transfers for beginners offer a gentle entry into wearable art because the workflow is straightforward: plan your artwork, print on DTF film, apply adhesive powder, cure, and transfer with a heat press. By visualizing each step as a repeatable cycle, you build confidence and can produce professional-looking shirts that hold up to regular washing. The value of this approach is that you convert a digital design into a tangible garment with relative ease, while keeping room to experiment with color, texture, and layering.
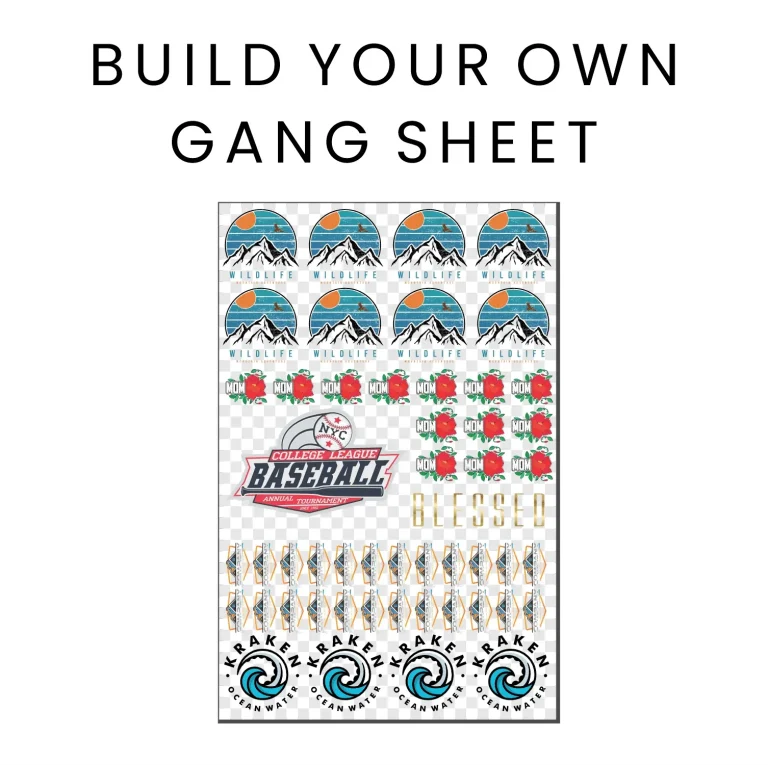
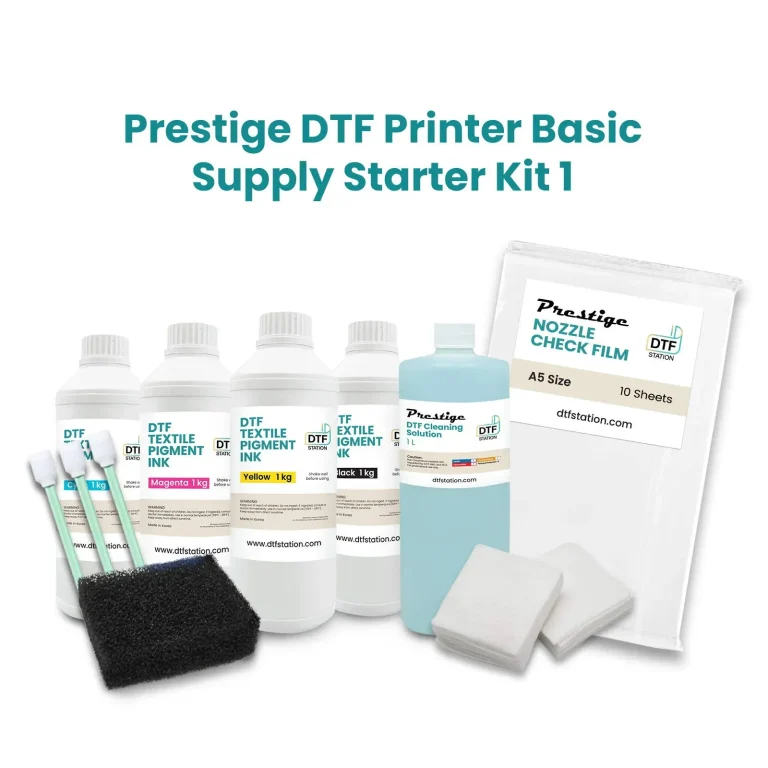
Getting started typically means assembling a starter kit and testing a few variables: a printer capable of white ink if you need a white underbase, the right DTF film, adhesive powder, and a steady heat press. Remember that the film quality matters a lot for sharp lines and accurate color reproduction, so try a couple of film brands on scrap fabric before committing to a run. Pre-press and careful alignment, plus consistent timing, help ensure the transfer bonds evenly across cotton, blends, and other fabrics.
DTF Design Tips, Film Quality, and Printing Basics for Reliable Results
Good DTF design begins with high-resolution artwork and thoughtful preparation. Work in 300 dpi or higher and export with a printer-friendly color profile. If you plan a white underbase, design with that layer in mind so the final result remains opaque on dark fabrics. Simplify color palettes, test separations, and keep text bold and legible so it reads clearly after the transfer. When using transparency or layered elements, verify how your printer handles them on the film and how they translate when pressed onto fabric.
To maximize reliability, connect design choices to your hardware and materials: choose a sturdy heat press for DTF with even temperature and consistent pressure, and run test presses on scrap garments to fine-tune the timing. Explore direct-to-film transfers with different film quality, powders, and inks to find combinations that deliver crisp edges and vibrant color. Understanding DTF printing basics and the nuances of DTF film quality helps you iterate quickly and scale from hobby projects to small-batch orders.
Frequently Asked Questions
DTF transfers for beginners: what is it and how do I get started with direct-to-film transfers?
DTF transfers for beginners describe the Direct-To-Film workflow, where artwork is printed onto a PET film, adhesive powder is applied and cured, and the design is transferred to fabric with heat. This approach is beginner-friendly because you can print on demand and work with complex designs without the setup of silkscreens or vinyl. Core steps include design prep, printing, powdering and curing, transferring with a heat press, finishing, and care. For starters, assemble a basic kit (DTF film, a white-ink-capable printer, adhesive powder, a heat press, and protective sheets), run small test prints on scrap fabrics, and practice pre-press, precise transfer temps, and edge handling. Consider practical DTF design tips like clean edges, high-contrast text, and planning a small bleed to avoid edge loss, and always test on scrap garments to dial in settings.
What should I know about DTF film quality and the heat press setup for DTF to ensure durable results?
DTF film quality is crucial because a smooth, high-quality film yields crisper lines, accurate color reproduction, and better adhesion; testing different film brands on scrap fabric helps you understand how the film interacts with your printer, powder, and heat press. For the heat press setup, aim for even temperature and pressure, with typical ranges around 160–180°C (320–356°F) for about 12–15 seconds and medium pressure, plus a pre-press to remove moisture. Follow your workflow’s peel method (hot-peel vs cold-peel) and consider a brief second press if needed for stronger adhesion, especially on dark fabrics. If colors appear dull or edges lift, check film quality, ink densities, and consistent pressure, and maintain calibration across prints to ensure durable results.
| Key Point | Summary |
|---|---|
| What are DTF transfers for beginners exactly? | DTF transfers refer to the journey from artwork to a ready-to-wear shirt using PET film, ink, and adhesive powder, resulting in a vibrant, durable image. For beginners, the main advantages include on-demand printing, support for intricate designs, and a simpler setup compared with traditional screen printing. |
| Why this approach works well for beginners | DTF offers a forgiving workflow that doesn’t require large production runs. It lets you experiment with color, texture, and layering while following a repeatable sequence: design, print, powder, cure, transfer, and finish. |
| The core steps you’ll master | Core steps: design prep, printing, powdering and curing, transferring, finishing, and care. Each step builds toward a repeatable cycle that yields professional-looking garments. |
| Design prep for DTF: preparing artwork that prints cleanly | Critical for clean results: use high-resolution artwork (300 dpi or higher), manage color entries, plan bleed, ensure legible text, and consider a white underbase if printing on dark fabrics. |
| Printing and curing | Print the design onto DTF film using the correct color profile. After printing, apply adhesive powder evenly, cure it to fix the powder, and keep the film flat to avoid dust and fingerprints. |
| Transferring to fabric: the heat press workflow | Pre-press the shirt, position the transfer correctly, and use a heat press set to around 160–170°C (320–340°F) for roughly 12–15 seconds. Peel the carrier while warm (hot-peel) or after cooling, depending on your workflow; a second press can reinforce adhesion. |
| Finishing and care | Let the garment cool completely, perform any touch-ups, and provide washing/drying guidance to maximize longevity. |
| Choosing your starter setup | Core components include DTF film and release sheets, a white-ink-capable printer, adhesive powder and curing device, a heat press with even temperature and pressure, protective sheets, and suitable fabrics (cotton tees or blends). |
| Understanding film quality | Film quality affects crispness and color accuracy. Use a high-quality DTF film to avoid color bleed and misregistration; test different brands to understand how they interact with your printer and powders. |
| Common pitfalls and beginner tips | Common issues include dull colors, edges lifting, sticky residue, and poor bonding on dark fabrics. Address them by checking film quality, ensuring even pressure, and calibrating inks and powders. |
| Practical tips for ongoing improvement | Maintain a clean, dedicated workspace; keep test garments; record temperatures, times, and pressures; experiment with different films and powders; and document successful settings for reproducibility. |
Summary
DTF transfers for beginners open an accessible path to high-quality, custom apparel. This guide emphasizes a straightforward, repeatable workflow—from design prep to the final press—that helps you build confidence and consistency. By selecting reliable film quality, mastering the printing and curing steps, and refining your heat-press technique, you can produce vibrant shirts that endure many washes. Clear aftercare instructions and careful testing across fabrics will reduce surprises and improve results over time. With practice, you’ll streamline setup, reduce mistakes, and expand your catalog from personal projects to small-batch orders. The more you practice, the more natural the process becomes, and your finished shirts will reflect the clarity, color, and durability that DTF transfers can deliver.