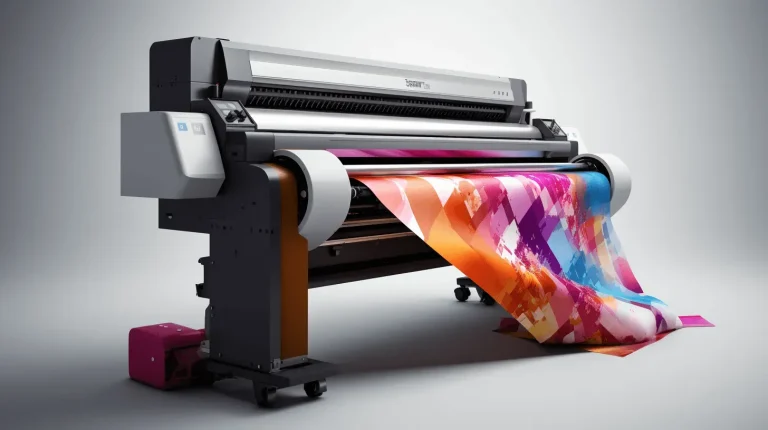
Direct-to-Film Printing is transforming how beginners and small businesses create customized apparel, offering vibrant designs with a soft hand and a forgiving workflow that lets newcomers experiment without a steep learning curve, while still delivering repeatable results, easy calibration, and the confidence to scale from hobby projects to small runs, which is especially valuable for home studios where space is limited and resources must be managed carefully. As you start out, you’ll likely hear terms like DTF supplies and DTF printing for beginners while selecting inks, films, and powders, mapping a realistic budget, comparing warranties, and planning your first tests, swatches, and sample garments to validate color, adhesion, and fabric compatibility, while it also helps you compare vendors and pick a kit that ships reliably within your target timeline. This method relies on a clear sequence—design on a transparent transfer film, apply an adhesive powder, cure, and press—so you can translate digital artwork into wearable art through a direct-to-film transfer, with each phase documented to diagnose issues, tweak settings, and build a library of reliable recipes, and share results with peers or online communities to gain feedback. Compared with older garment-printing options, DTF transfer film technology delivers excellent color fidelity on cotton, blends, and synthetics, preserves a softer hand, reduces backend setup complexity, and accommodates a wide range of fabrics when you follow manufacturer guidelines, maintain clean equipment, and choose dependable supplies, while regularly reviewing results to catch issues early and refine preflight checks. To set you up for success, you’ll want to choose reliable DTF inks and powders, invest in a compatible transfer film, and practice a repeatable workflow that includes calibration, test patches, and careful heat and pressure control, while documenting outcomes, learning from misfires, and refining your process for consistent, durable finishes, and you can build a robust, scalable playbook by recording environmental conditions and film-ink interactions.
Beyond the brand name, this process can be described as a film-based transfer method for textile decoration, where a printed image travels on a clear carrier and is fused to the fabric under heat. In LS I terms, related concepts include color transfer, pigment inks, adhesive powders, transfer film quality, fabric compatibility, and heat-press parameters, which helps search engines understand the topic by connecting synonyms and semantically linked ideas. Practically, designers think in terms of substrates, color fidelity, wash durability, and workflow efficiency, using terms like film-based graphics, printer settings, and post-transfer care to frame the process. For entry-level garment customization, this approach offers a scalable option that fits home studios and small shops, aligning with the ideas of beginner-friendly workflows, compatibility testing, and practical optimization strategies.
Direct-to-Film Printing for Beginners: Master the Basics and Build a Durable Workflow
Direct-to-Film Printing introduces a flexible, color-rich way to create designs for a wide range of fabrics. For beginners, understanding the four core components—DTF transfer film, DTF inks (including white underbase), the adhesive powder, and a compatible heat press—sets the foundation for reliable results. By focusing on these essential DTF supplies and a repeatable workflow, you can move from initial experiments to consistent transfers.
Begin with a plan: select a reputable DTF transfer film and inks that pair with the powder you’ll use, then assemble a simple setup such as a consumer-grade heat press and a printer capable of DTF inkjet runs. Consider your target fabrics—cotton, blends, and some synthetics—and tailor curing times and temperatures accordingly. This practical approach supports DTF printing for beginners by reducing trial-and-error and building confidence before expanding to more complex designs.
Optimizing DTF Workflow and Materials for Consistent, Colorful Transfers
To optimize the workflow, maintain consistency across pre-press, transfer, and curing steps for direct-to-film transfer. Verify film compatibility with your DTF inks and powders, calibrate color profiles, and adopt a repeatable set of heat and time settings. Document temperatures, times, and fabric types to build a library of successful combinations for DTF transfer film, ensuring vibrant results across projects. This emphasis on process control is central to practical DTF supplies knowledge and helps beginners achieve reliable color fidelity over time.
Maintenance and storage are also critical for long-term success. Keep DTF inks and powders in their recommended conditions, store DTF transfer film properly to prevent moisture and dust, and clean printers and heat presses regularly. Maintain a simple log of settings and outcomes, and run periodic test patches on fabrics similar to your target orders. With disciplined care, DTF printing for beginners becomes scalable, leveraging trusted DTF supplies to produce durable, wash-fast transfers.
Frequently Asked Questions
What is Direct-to-Film Printing and which DTF supplies should a beginner start with?
Direct-to-Film Printing is a modern method for creating full-color transfers using a PET film, specialty inks, and a heat-activated adhesive powder. For DTF printing for beginners, start with the essential DTF supplies: DTF transfer film, DTF inks and powders (including white ink for underbases), a printer capable of handling DTF output, and a heat press. Add release sheets, cleaning supplies, and optional tools like a powder shaker. Choose a reputable starter kit or a proven ink-film-powder combination and follow the manufacturer’s curing times and temperatures to achieve consistent results.
How does Direct-to-film transfer work and what is a beginner-friendly workflow for DTF printing?
Direct-to-film transfer typically follows these steps: prepare artwork; print on the DTF transfer film with DTF inks and white ink when needed; apply adhesive powder evenly and cure to fuse the ink to the film; pre-press the garment to remove moisture; transfer to fabric with a heat press at the recommended temperature and time (common ranges around 160-170°C for 8-15 seconds, but follow your suppliers’ guidelines); peel the transfer hot or cold as advised; post-press to lock in adhesion and then cool and care for the print. Maintain consistency by calibrating color, using quality DTF transfer film, and following your ink and powder supplier guidelines. Common issues include faded colors, underbase not appearing on dark fabrics, powder clumping, and edge cracking after washing.
| Topic | Key Points |
|---|---|
| Introduction and Overview | Direct-to-Film Printing (DTF) is a modern method for full-color transfers that uses a PET film, inks, adhesive powder, and a heat press. It aims to produce vibrant designs with a softer hand-feel on a variety of fabrics, offering a relatively forgiving workflow for beginners. |
| What is Direct-to-Film Printing? | DTF involves four core components: the film, the inks (CMYK and white underbase when needed), the adhesive powder, and the heat-press transfer. The design is printed on PET film, the powder is cured, and the film is then transferred to fabric via heat, yielding durable transfers on cotton, blends, and certain synthetics. |
| Why DTF might be right for beginners | Advantages include a relatively straightforward workflow, lower entry cost, and the ability to print full-color designs without color separations. The supply ecosystem has grown, and the technique supports a wide range of fabrics, making it approachable for newbies when using reputable inks, film, and a reliable heat press. |
| Essential DTF Supplies for Beginners | – DTF transfer film (compatible with your inks and powders) for design transfer – DTF inks and white ink (white underbase for brightness on dark fabrics) – Adhesive powder (DTF powder) – Printer capable of DTF prints (inkjet or dedicated DTF printer) – Heat source for curing and transferring (heat press; others like conveyor dryer possible) – Release sheets, protective coverings, and cleaning/maintenance supplies – Optional tools: powder shaker/sifter, lint rollers, masking tape for precise placement – Focus on compatibility, warranty, and manufacturer guidelines for curing times and temps |
| Step-by-step Guide to a DTF Print | 1) Prepare artwork and settings: design with vector/hi-res raster, color profiles (e.g., sRGB), mirror if needed, align within printable area. 2) Print on the transfer film: load inks and film, print test page, apply white underbase if required, allow slight drying. 3) Apply adhesive powder and cure: apply powder evenly, use a shaker, cure with a heat source to fuse the ink to the film, brush off excess powder. 4) Pre-press the garment: remove wrinkles/moisture; adjust pressure/temp for delicate fabrics. 5) Transfer the design: align film on garment, cover with silicone sheet, press at recommended temp/time (typical ~160–170°C / 320–340°F for 8–15s). 6) Peel and post-press: hot or cold peel per film, post-press if needed for adhesion and finish. 7) Curing and care: cool completely, provide garment care instructions to end users. |
| Common issues and troubleshooting | – Faded colors: verify ink levels, curing, and powder adhesion. – White underbase not appearing on dark fabrics: check white ink coverage and underbase density; ensure film/underbase alignment. – Powder clumps/uniform fusion: sift thoroughly, adjust curing time, ensure consistent heat. – Peeling/cracking after washing: confirm transfer temperature/pressure, fabric compatibility, and care guidelines. |
| Applications and fabrics | DTF works on cotton, cotton blends, and some synthetics; common applications include T-shirts, tote bags, and accessories. For athletic/high-polymer blends, test compatibility and consider pre/post-treatments for better adhesion and color stability. |
| Maintenance, care, and long-term considerations | Regular printer maintenance (cleaning printheads/paths), use genuine or well-reviewed inks/powders, store films/powders in a cool, dry place, and periodically re-test the workflow with small runs to maintain consistency. |
| Getting started tips | Start with reputable starter kits or proven ink/film/powder combinations, verify compatibility across components, and maintain a simple log of settings to replicate successful results. |
Summary
Direct-to-Film Printing (DTF) is a modern and accessible method for creating full-color transfers across a range of fabrics. By combining a PET transfer film, specialty inks (including white underbase), adhesive powder, and a heat-press process, beginners can achieve vibrant, durable designs with a relatively forgiving workflow. The essential DTF supplies, a clear step-by-step workflow, and practical tips help new printers build a solid foundation, while troubleshooting guidance and fabric considerations support ongoing improvement. As you gain experience, DTF enables expansion into more products and fabrics with consistent, professional results.